I haven't posted many crafting corner posts recently, I guess I've not been feeling very creative over the last few months so I haven't had a lot to talk about on here. I've seen various versions of these Christmas Trees made from old paperback books and it's been something I've wanted to try for a long time now but when my awesome blogger friend Susan K Mann posted a picture on her Instagram page of a book tree she'd made with her son (see image below) I found myself feeling really inspired to give it a go!
I had no clue where to start but after a little bit of googling I found the following tutorial video. Jeannie actually includes all sorts of ideas on how to decorate your finished tree which I might try next year but for now I really loved the simplicity of Susan's tree.
I took step by step photos as I went along so here are my really simple instructions on how to make your own bookish Christmas Tree. If you have any problems following you might want to watch the above video because it's hard to describe the process!
1. Take an old paperback and remove the cover. This was probably the worst part because I felt so terrible destroying a poor innocent book! I used a fairly short book and folded used just over 200 pages to make my tree. I don't think you'd really need more pages than that so you can cut off any excess pages using a sharp knife (please be careful & supervise any children at this point!) but I might try making one with less "branches" just to see how it turns out.
 |
| Step 1 |
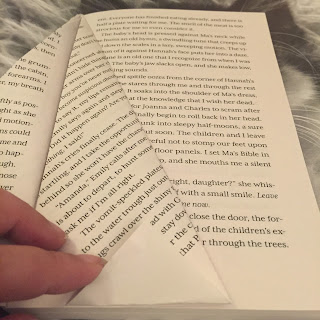
2. Take the top right hand corner of the page and fold it towards the left hand side, it's hard to explain that in words but hopefully you'll see what I mean from the picture above (imagine you're folding one side of a paper aeroplane!)
 |
| Step 2 |
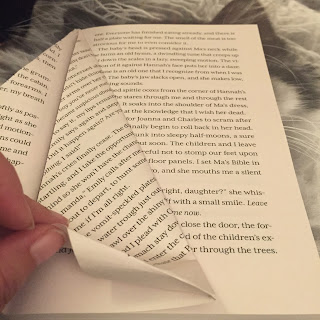
3. Fold the paper for a second time so you have a long thin triangle, think step 2 of making your paper aeroplane.
 |
| Step 3 |
4. You need to get rid of the overlap at the bottom of the book so that the tree will stand on it's own when it's finished. I found the easiest way was to fold the paper upwards to make a crease and then tuck the corner inside the folded page so that it doesn't spring open.
 |
| Step 4a |
 |
| Step 4b |
5. Now you just need to repeat steps 2 - 4 approximately 200 times! Obviously it's entirely up to you how many pages you choose to work with but that seemed to work well for me this time around. It's surprising how quickly you'll settle into a rhythm once you get started and this is something that is very easy to do while you're sat in front of the TV or listening to an audiobook.
 |
| Step 5 in progress |
By the time you're finished you'll have something that looks a lot like this:
 |
| Step 5 complete |
Now I actually think the tree looks pretty cute on it's own but you can decorate it any way you want to. I don't have any paint or glitter in the house (although I might try that for next year) but I loved the star topper Susan made so I searched for origami star instructions online to make my own.
The star tree topper I created was made using this tutorial on Homemade Gifts Made Easy. I made it using some spare wrapping paper I had laying around and attached the star using blu tack so it'll be really easy to change the decoration whenever I feel like it.
 |
| My Decorated Book Tree |
You could always make a star with a spare page from your book like Susan did but pretty much anything goes when it comes to decoration. The sky is your limit and I'm already thinking about decoration ideas for next year and I have a feeling I'm going to end up with a family of book trees eventually LOL.
Anyway, I hope you all have a lovely Christmas & a very Happy New Year! Let me know if you've made your own bookish tree, I'd love to see pictures and get some more inspiration for next year :o)


No comments:
Post a Comment